
In this AI video tutorial, I’m going to show you how I used Kittl AI Video to turn a single still image into a Halloween ghost scene, connect two generated clips together, fix a continuity problem when the clips didn’t quite match, and finish the video in Clipchamp. And I left several of the failed generations in the video on purpose. Not because I enjoy burning Kittl tokens for entertainment, but because those failures show something important. Creating an AI video often takes some trial and error, but the more you do it, the better you get. The model may understand most of your prompt perfectly and then decide the smoking letters on your artwork really need to start smoking again. Thanks, AI.
The finished video started as a simple wall-art mockup and eventually became an approximately 18-second Halloween video where a ghostly woman appears to emerge from the artwork and move through the room. You could use the same basic workflow for product videos, social media posts, seasonal promotions, or simply to create a fun Halloween jump scare. Let’s get started!
What We’re Creating in This AI Video Tutorial
The idea was pretty simple. I created a wall art mock-up image just for this tutorial (but this basic idea could apply to other wall art sellers and possibly other products). I wanted the beginning of the video to look like a normal product video featuring my fake wall art. The camera would slowly move toward the artwork, giving the viewer a good look at the art. Then a ghost resembling the woman in the framed artwork would enter the scene.
The workflow eventually looked like this:
Still image → slow camera movement → ghost scene → continuity fix → Clipchamp editing → finished Halloween video
The important part is that I didn’t try to make the AI accomplish everything in one enormous generation. That’s how you end up with crazy results and wasted tokens (which can happen anyway, as it did to me in this one, lol, but it would’ve been much worse if I hadn’t broken the process down). My rule when dealing with AI is to control as much of the process as you can to help cut back on mistakes.
So for this, I created smaller video clips and connected them together later. That gives you more control over the AI video creation process and, depending on the model you’re using, can also help conserve generation credits or tokens in the end.
Step 1: Start With Your Original Image
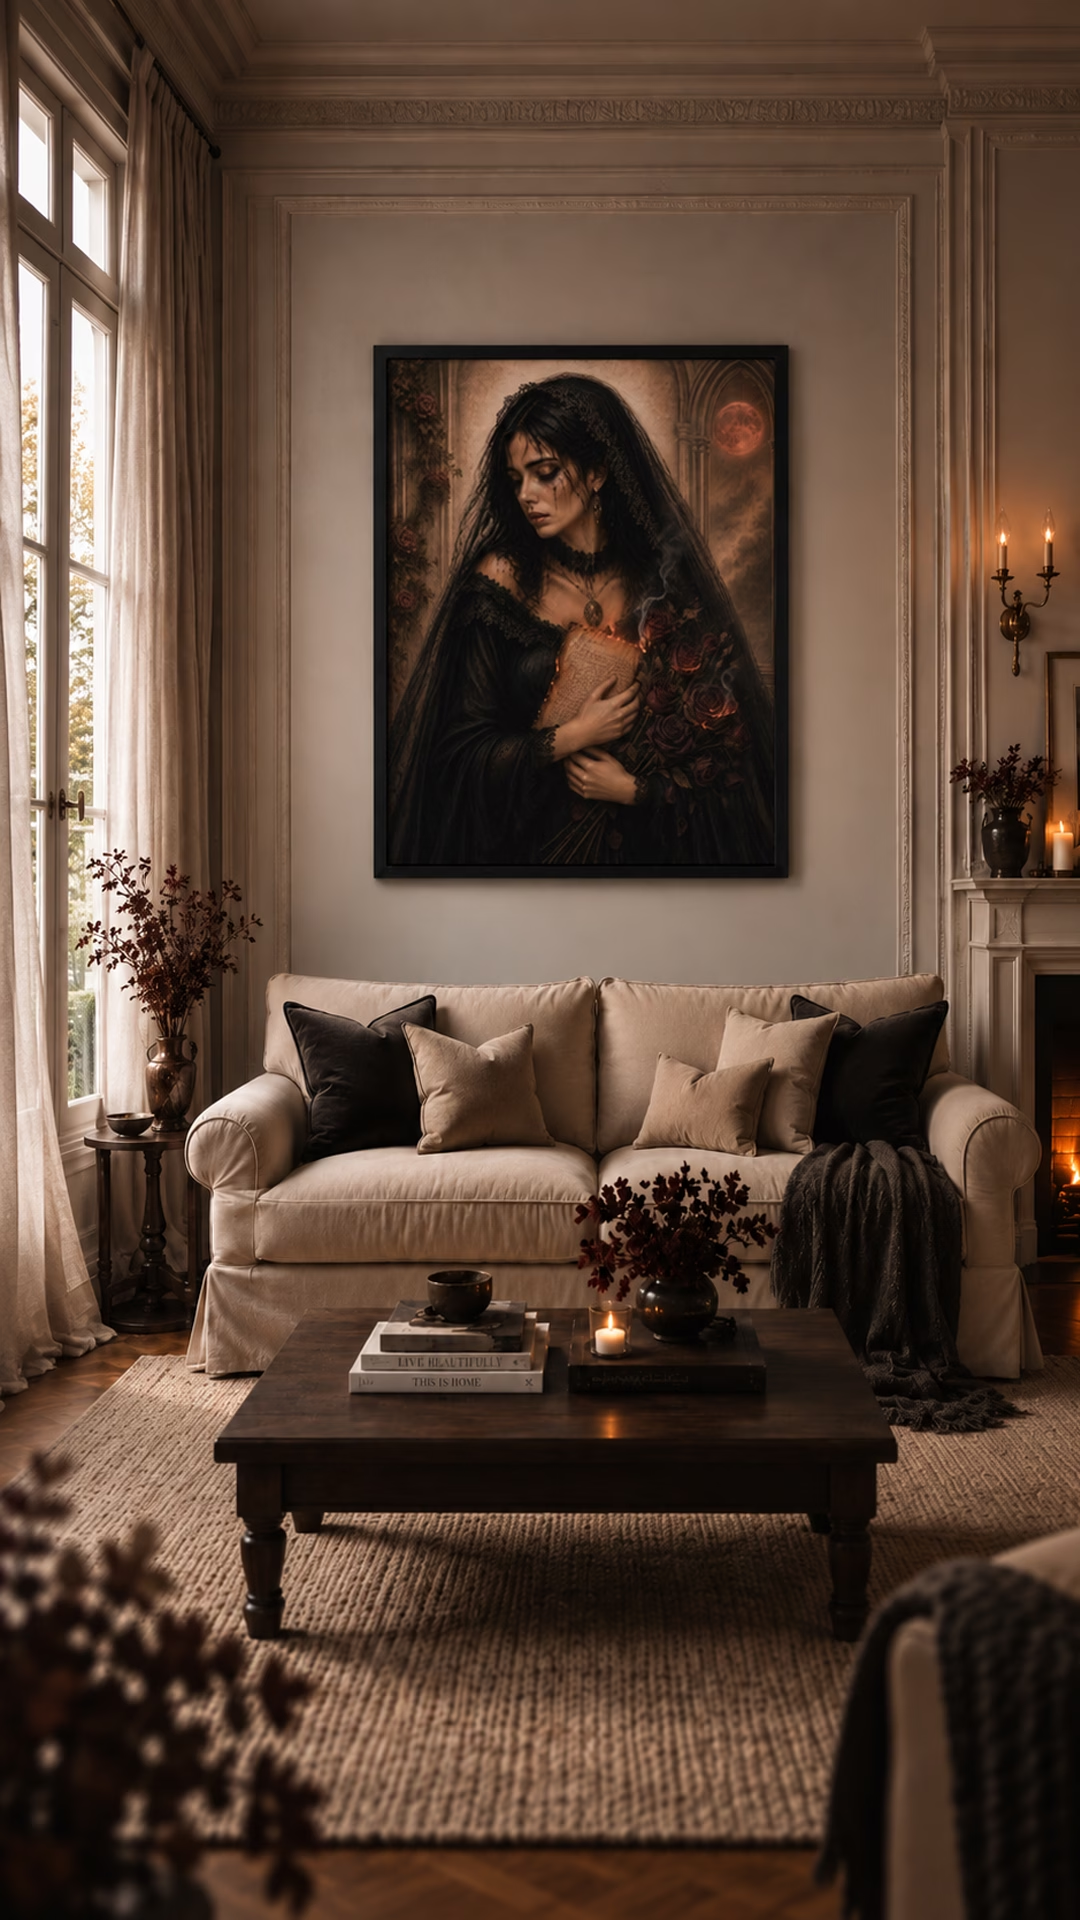
I created my starting image before opening the Kittl video generator. I basically had an old idea for wall art that I wasn’t using and created a vertical wall-art mockup for it. The artwork and product are only examples created for the tutorial. I’m not actually selling this haunted lady. At least I don’t think I am…
I created the project at 1080 × 1920 pixels, giving me a standard 9:16 vertical format that works well for short-form social media video. You could also create or modify the starting artwork inside Kittl. In my case, I already had the images prepared and uploaded them directly.
I also created a second image showing the same scene from a closer viewpoint. The goal for the first generated clip was simple: move from the wider product shot into the closer shot. I could’ve prompted the AI video generator to do this for me, but by giving it two reference points (the start and the finish) it has less room to get creative, lol. Keeping each AI generation focused on one task generally gives you a better video render.
Step 2: Create the First AI Video Clip
For the first scene, I wanted a slow camera push toward the framed artwork while absolutely nothing else in the room moved. That last part proved to be more important than it sounds. My first attempts looked interesting, but the AI decided the letter the woman was holding in the portrait needed to be on fire. Cool Halloween effect? Absolutely! The effect I asked for? Nope, lol, not at all!
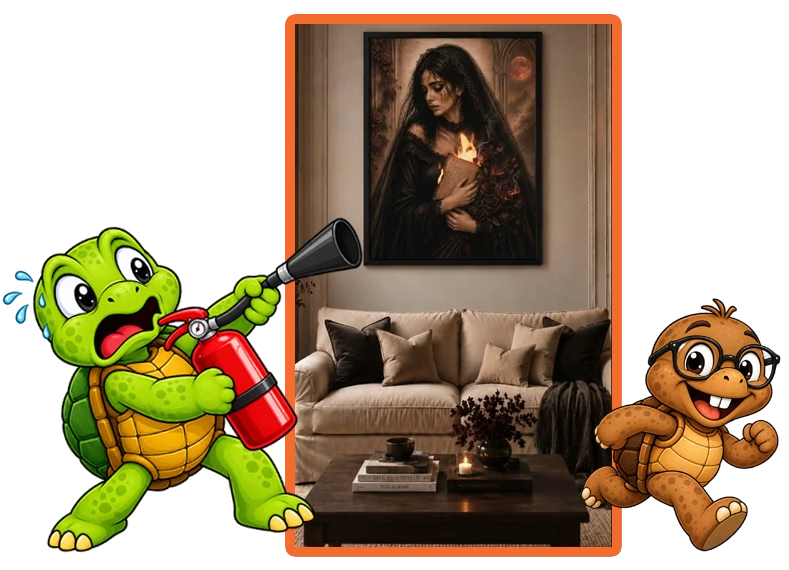
My next attempt pulled a similar result with the letter smoking, so I changed the video generator from Seadance 1.5 Pro to Kling 2.5 Turbo Pro. For this, Kling gave me the clean camera movement I wanted without all the drama Seadance gave me, lol. This is also why I don’t recommend assuming that one video model will always be the best option. Different AI video generators may interpret the same prompt differently. AI video generators are constantly changing and improving, so it is often worth spending the tokens to find the one that works best for you. As you’ll see, this Kittl AI video tutorial tested me several times before I got eveything the way i wanted it.
Prompt #1: Slow Zoom Toward the Artwork
“Create a smooth, slow forward camera push-in from the start frame to the end frame in one continuous shot. This is a camera move over a completely static interior scene. The framed wall art is a printed artwork and must remain perfectly unchanged and completely still throughout the entire video. Nothing inside the artwork may move, animate, smoke, glow, flicker, burn, shift, or change in any way. Keep the room, sofa, coffee table, curtains, window, fireplace, lighting, and decor identical and stationary. No atmospheric effects, no breeze, no smoke, no flames, no ghost, and no extra motion. Only a clean, realistic listing-style camera push-in.”

Side note that Sheldon insisted on: This video came out great, but later when I went to combine this clip with another, AI had made an adjustment I couldn’t see until the 2 clips were combined. Ultimately, I had to recreate this one again, but I have the prompt for that one later in the article. Maybe Sheldon will calm down now, and we can get on with this Kittl AI video tutorial!
AI Video Generation Doesn’t Always Follow Directions
This is probably a good place for a warning. Your first AI video generation may not work. Neither may your second or third, lol. Working with prompts and Kittl AI video generators requires patience and the ability to adapt and pivot. The more you do these, the more you’ll learn what works and what doesn’t. This is why I left the fails within the Kittl AI video tutorial. I think it’s important that you see mistakes will inevitably happen. It’s not just you! In fact, most of the time it’s not you at all. It’s the AI video generator being dramatic, lol.

During this particular project, I had generations where:
- parts of the artwork began moving when they weren’t supposed to,
- smoke appeared where I didn’t want it,
- the ghost looked like a regular woman casually walking through somebody’s living room,
- the ghost became too solid,
- the motion looked mechanical,
- and one version created so much ghostly smoke that the entire effect started looking cartoonish.
I show several of those failures in the Kittl video tutorial because they’re part of working with generative AI. But I’m not going to make you read through every failed prompt here. That would just be boring. Instead, I’m giving you the three prompts that matter to the finished workflow. That should save you some time, and hopefully a few tokens along the way, lol.
Step 3: Create the Halloween Ghost AI Video
Once the basic camera movement was working and the first clip was rendered, it was time for the fun part. The goal was to create a subtle Halloween AI video effect where someone initially thinks they’re watching a normal wall-art product video before realizing something isn’t quite right. I wanted a ghostly woman resembling the woman in the framed artwork to appear inside the room. My idea was to create this like a normal social video post, focusing on the wall art, then add a Halloween twist that could grab the viewer’s attention and encourage them to keep watching or replay the video.
On sites like Pinterest, video performance is measured with metrics including watch time, average play time, 10-second plays, and 95% views, so holding attention can matter just as much as getting the initial view. Meta makes a similar point with Facebook and Instagram Reels, describing Reels as an attention-driven format where people watch, participate, share, and take action. The longer you can hold someone’s attention, the better chance you have of keeping them engaged with the post.
AI Video Tutorial Mistakes Strike Again!
I went through several prompts and video generators trying to get this right, but the mistakes were piling up, lol. The first render created a fully fleshed-out woman in a white gown walking through the scene. The next one had some transparency like a ghost, but was still walking when I wanted her to float more like a ghost. I tried different prompts and different AI video generators that Kittl offered, but nothing was working. So then I adjusted my approach, and in the process, I got a much better idea. Instead of having her just cross the scene, it became obvious that I should have her come to the middle of the scene, then rush the screen in a screaming fit, lol.
To get more control over the generation, I made two changes. I used Gemini Omni Flash 1.1 and created 4 reference images. Gemini Omni Flash 1.1 in Kittl allows multiple reference images to help in guiding the prompt. In my case, this was to help guide the AI and show the ghost at different points in the scene- the missing factors I needed to get her to do what I wanted. Not only was I having movement issues with her, but she just wasn’t transparent and ghostly enough, lol.
Using Images to Direct the AI Video Generator
So the first reference image established the room and the starting point. To get this image, I took the first video clip into ChatGPT and had it extract the final frame. That became my 1st image. The second reference image showed the ghost in the center of the room. To create this, I took the first reference image and placed the ghost on top of the scene where I wanted her. I lowered her transparency so she would have more of the ghost look I wanted. The third one was basically the same thing, but I established her closer position with her screaming and her hands out. The final reference image brought the scene back toward the original composition.
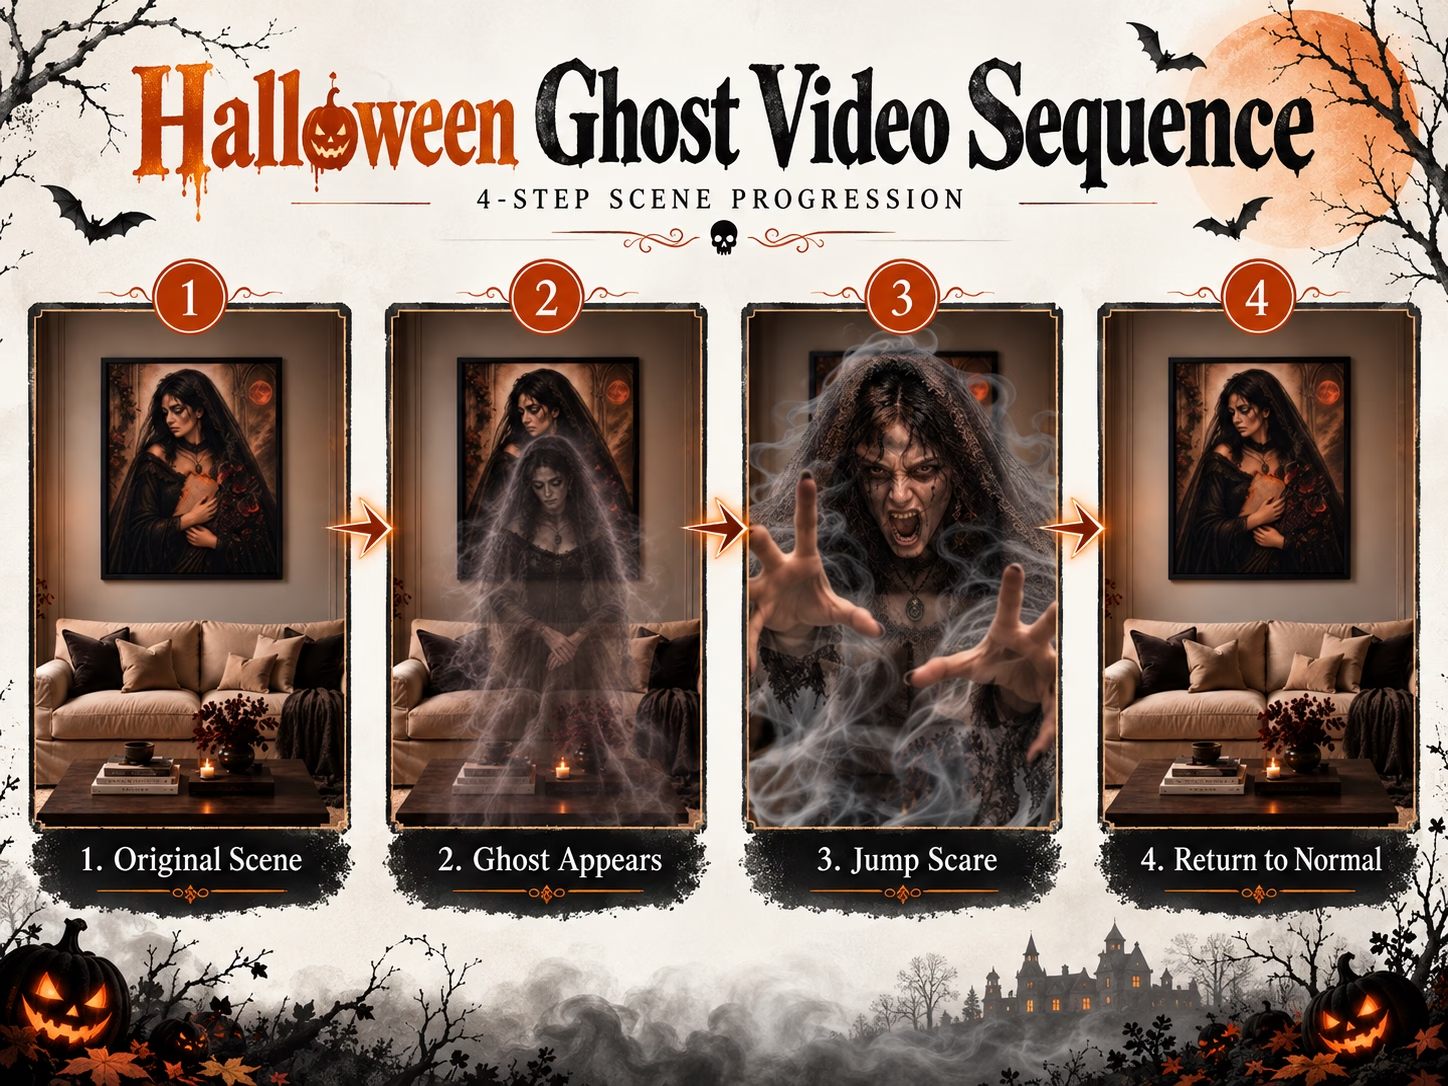
Using those visual reference points gave the AI considerably more information about what I was trying to accomplish than a text prompt alone.
Prompt #2: Ghost Woman Video
“Create a realistic cinematic haunted interior video using the clean living room image as the first frame and the same clean living room image as the final frame, so the room begins and ends unchanged. Keep the camera locked and keep the room, framed wall art, sofa, coffee table, curtains, fireplace, lighting, and decor consistent and stationary throughout the shot. Begin with a brief pause on the empty room. Then the ghostly woman begins to materialize subtly from the left side of the frame. Match the appearance of the calm ghost reference image closely. She should have pale, haunted features, dark eyes, long dark hair, a black lace veil, gothic black clothing, and the same spectral transparency shown in the reference. Preserve her exact ghostly transparency throughout the entire video. Do not make her more solid at any point. The room and furniture should remain clearly visible through her face, hair, clothing, arms, hands, and torso. Her opacity must stay consistently low and spectral, including when she reaches the center and when she rushes toward the camera. She slowly floats into the foreground toward the center of the room. She does not walk, does not step, and does not move like a normal person. Her motion should feel weightless and supernatural. Use only a faint, realistic ethereal haze around her edges and a small amount of subtle trailing mist. Avoid exaggerated smoke, cartoonish wisps, magical swirls, or stylized fog effects. As she reaches the center, she gradually slows and lingers. She then seems to realize that the viewer is watching her. Her attention shifts naturally toward the camera, her eyes lock onto the viewer, and she holds that haunted stare for a brief unsettling moment. This should feel organic and eerie, not mechanical. Then her expression suddenly changes into the screaming version shown in the second ghost reference image. Match that reference closely for the final action: open screaming mouth, intense haunted expression, and both hands reaching toward the viewer. She suddenly surges straight toward the camera in one continuous supernatural movement. The ghost does not run, walk, or stop. She remains semi-transparent and visibly see-through as she approaches. Do not increase her opacity as she gets closer to the camera. She must not pause or stop in front of the lens. As she reaches the camera, she disappears in the same forward motion, dissolving instantly into a brief, realistic burst of faint ghostly haze at the moment she reaches the lens. The disappearance should happen fluidly as part of the forward movement, not after she stops. The haze quickly dissipates, revealing the original empty room again. Hold briefly on the unchanged room at the end. Do not animate anything inside the framed artwork. Do not change the furniture, room, curtains, lighting, or decor. No walking, no footsteps, no flames, no extra characters, no exaggerated smoke effects, and no cartoon or fantasy-style supernatural effects. Keep the ghost photorealistic, translucent, eerie, and believable throughout the entire sequence.”
This became the main ghost AI video portion of the finished project. And yes, it took several attempts to get to the one I wanted, but using the AI video generator with the higher token cost was worth it in the end. It gave me the opportunity to use those reference images and kept it from stepping outside of those guidelines.
How to Continue an AI Video From the Previous Clip
One of the tricks I used throughout this project was taking a frame from one video and using it to help create the next.

The basic idea is:
- Generate your first video clip.
- Export it.
- Grab the final frame as an image.
- Use that image as a reference or starting point for the next AI video.
- Generate the next scene.
In theory, this gives the second clip a starting image that matches exactly where the first clip finished. In theory. Unfortunately, AI still gets a vote, lol. And that’s where I ran into another problem in this tutorial. I could have easily scrapped the whole project or omitted these AI fails, but that doesn’t help you understand how AI video generators work.
What Happens When 2 AI Video Clips Don’t Match?
When I brought the two finished clips into Clipchamp, I discovered that they didn’t connect as smoothly as I expected. Even though I had used the previous video’s final frame as part of the process, the AI had slightly changed the scene. The difference wasn’t enormous, but when the clips played back-to-back, there was an obvious little jump. Once you see it, you can’t unsee it, lol.
I experimented with the idea of disguising the transition with effects. Since this was a Halloween video, lightning would have been a convenient excuse. i even toyed with the notion of using rough VHS effects to make it feel haunted or glitchy like something unnatural was about to happen. For this type of video, those options would be perfectly fine. But that wasn’t really fixing the problem. The AI video tutorial I wanted to show was meant to be a usable process that you could apply to other ideas, like a Christmas video or any other number of applications. So instead, I decided to reverse engineer the first clip around the second one.
Step 4: Recreate the First Clip to Match the Second
Rather than regenerate the ghost scene that had already taken several attempts to get right, I kept it. The easier way to fix this was to recreate the first scene again and have it match the ghost scene. I took the ghost video into ChatGPT and had it extract the very first frame of it. That would give me the original image as the starting frame and this extracted image from the ghost video as my end frame. Now I wasn’t asking the second clip to match the first. I was rebuilding the easier clip so it would arrive at the exact scene I already knew I needed. To recreate it in Kittl, I used Kling 2.5 Turbo Pro again and fed it a prompt.
Prompt #3: Recreated Connecting Clip
“Create a smooth, slow backward camera pull-back from Image 1 to Image 2 in one continuous shot. Start by matching Image 1 closely, then gradually zoom out until the final frame matches Image 2. This is a camera move over a completely static interior scene. The framed wall art is a printed artwork and must remain perfectly unchanged and completely still throughout the entire video. Nothing inside the artwork may move, animate, smoke, glow, flicker, burn, shift, or change in any way. Keep the room, sofa, coffee table, curtains, window, fireplace, lighting, and decor identical and stationary. No atmospheric effects, no breeze, no smoke, no flames, no ghost, and no extra motion. Preserve the exact composition, style, and details of both reference images, with Image 1 as the starting view and Image 2 as the ending view. Only a clean, realistic listing-style camera pull-back / zoom-out.”
This is probably the biggest lesson from the entire project:
When two AI video clips won’t match, you may have better luck rebuilding the simpler clip around the successful one instead of repeatedly regenerating the complicated scene.

That saved me from spending more tokens trying to recreate a ghost generation I already liked. But AI still threw me one last curveball. Instead of immediately moving in the direction I requested, the generated camera briefly moved the wrong way before correcting itself. On further inspection, this was my fault for relying too much on ChatGPT and not reading what the prompt actually said. The prompt instructed it to pull back like that. So that one is on me. Calm down, Sheldon. I admitted my mistake! Rather than throwing away another generation, I simply trimmed off the bad section during editing. Problem solved.
Step 5: Combine the AI Video Clips in Clipchamp
Now that I had two clips that connected reasonably well, I moved into Microsoft Clipchamp to finish the video. Clipchamp lets you combine multiple video and audio assets on a timeline, split and trim clips, adjust speed, work with audio, and export the finished project. Microsoft also provides a free tier for personal accounts, so it’s definitely worth checking out. You can always use a video editor like this to help improve and polish the AI videos you create. This part of the workflow didn’t require me to generate anything else with AI. I could work with the video I already had.
Slow Down the Opening
I wanted viewers to have enough time to notice the framed artwork before the ghost appeared. It’s important not to lose sight of the reason behind the video. We are trying to sell the wall art, after all. So the slow opening would tackle two tasks for me at once. It gives the viewer a good look at the product I’m selling AND gives the illusion that this is just like other product videos they may have seen. For the Halloween side of this, it builds a nice comfort level we can play on, lol.
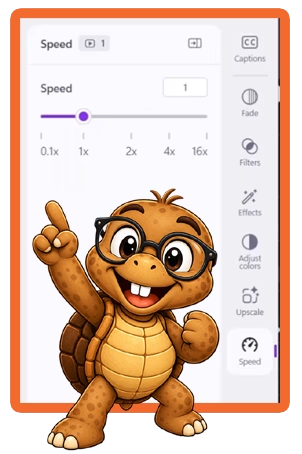
To do this, I took our opening video, clicked it on the timeline, and selected Speed on the right-side panel. I played with the timing there until I was happy with the speed. In this case, I originally set it to about 12 seconds, but after watching it, I felt it was too long. Ultimately, I landed on almost 9 seconds for the opening, especially knowing that I wanted to slow down her initial entrance. That lets the viewer register the product before anything unusual happens.
Splitting Up the Ghost Scene
The opposite effect was needed for some of the ghost clip. I brought it to the exact point where she is in the center of the room and has come to a stop. I right-clicked the clip on the timeline and selected Split. This cut that clip into two parts for me to work with. I wanted to slow down her movement from when she enters up until the split, so, like the section above, I slowed that section down. It ended up at about 7 seconds, which gave her a creepy slow movement into the scene.
But for the last section where she rushes the camera screaming, I knew we had to speed that up for it to be more effective. Same as before, I clicked that split section of the clip and bumped the speed up to where it took right at a second.
By splitting the clip into sections and adjusting their speed independently, I could let the ghost creep into view and then increase the pace once the action picked up. Clipchamp allows clips to be split and their playback speed changed independently, which gives you much more control than simply accepting the timing the AI generator gives you. That was especially useful here because the AI-generated clips weren’t necessarily the exact length or pacing I wanted for the final edit.
Step 6: Fix the AI Video Audio
The next problem was audio. I really liked the audio that rendered with the video of the ghost woman, but figuring out how i could use it posed some interesting problems. For starters, changing the speed of different sections also changed how the original generated audio lined up with the video. My first attempts at stretching and rearranging the audio weren’t particularly good. The scream didn’t line up at all, so that wouldn’t work, lol.
So I eventually exported the edited video, brought that finished version back into Clipchamp, and detached the audio. That gave me a clean audio track that matched the new timing.
From there I could:

- lower the quieter background portion,
- split the audio where the scare begins,
- raise the volume during the ghost’s scream,
- and control the final effect much more precisely.
Clipchamp officially supports detaching audio from video and adjusting the volume of individual audio segments, so you don’t have to leave the AI-generated soundtrack exactly as it was produced. This was perfect for what I needed, and the end result worked like a charm!
Add a CTA or Product Screen at the End
My example ends after the ghost scene, but if you’re creating this type of AI video to promote an actual product, I wouldn’t necessarily stop there.

You could finish with:
- your shop name
- the product image
- a website URL
- a short call to action
- a sale message
- or a simple Shop Now screen.
I’ve already used this approach in another Kittl video tutorial where I created a Kittl AI video tutorial featuring a Witch’s Brew shirt and added a product-focused ending. It was a really cool effect where the final message magically spelled everything out on a menu board. See my Kittl AI product video tutorial and the Witch’s Brew example. Using this method gives the viewer somewhere to go after you’ve caught their attention instead of simply ending the video after the AI effect.
This Doesn’t Have to Be a Halloween AI Video
I used a ghost for this Kittl AI video tutorial because Halloween gave me an excuse to make a woman crawl out of a portrait and terrorize Sheldon. But the same basic AI video creation workflow can work year-round in a variety of ways. Let your creativity be your guide!
- Christmas: Start with holiday wall art and have Santa come in and place a present under the tree
- Valentine’s Day: Animate a romantic product scene or introduce a small visual surprise.
- Mother’s Day: Create a softer product reveal with flowers or movement around a gift for Mom.
The important part isn’t the ghost. It’s the process of breaking one idea into smaller AI video scenes and then assembling them into one finished video. And yes, I’ll probably be experimenting with more of those as the different holidays roll around.
What I Learned From This Kittl AI Video Tutorial
This wasn’t a one-prompt-and-done project. As you can see, there were several failed renders. There were prompts that technically worked but created the wrong effect. There were even prompts created that worked perfectly, just not in the way I wanted since I didn’t proofread them, lol. One AI model handled the simple camera move better than another. Another generator became useful when I needed multiple reference images. And even after using a frame from one video to help create the next, the two clips still didn’t match perfectly.
But that is also why I think projects like this make better AI video tutorials. You’re seeing the actual process. Not just “Here’s the prompt. Look what magically appeared!” The more useful skill is learning how to recognize why a generation isn’t working, change your approach, preserve the parts that did work, and solve the remaining problem without continually starting over.
But What About Those Failed Videos?
The thing I absolutely love about Kittl is that they are constantly evolving. From what I have heard, they are releasing a new feature that will allow you to edit videos very soon. That could be a huge game-changer! I don’t know what all is involved and what it can do yet, but what i do know is that I will be creating an AI video tutorial covering this feature as soon as it’s released. I plan on taking some of these failed video renders and testing them out, so you probably haven’t seen the last of the haunted woman here, lol. Isn’t that the way with ghosts, though? They just keep turning up when you least expect it, lol.
Want to Try Kittl?
I’ve been using Kittl for both design work and AI video experiments, and this tutorial is a pretty good example of why I like testing the tools beyond the obvious use cases. You can start with a free Kittl account and experiment with the tools yourself.
Affiliate disclosure: If you sign up for Kittl through my link, I may earn a commission at no extra cost to you.
Final Thoughts On This Kittl AI Video Tutorial
This Halloween ghost project started as a simple idea- turn one static image into something that looked like an ordinary wall-art video until a ghost suddenly appeared. Getting there took more experimenting than I originally expected. But I also ended up with a much more useful lesson than simply learning how to generate one spooky clip.
I learned how to build an AI video from smaller scenes, use reference frames to guide the next generation, recover when those scenes don’t match, and finish everything inside a regular video editor without continuing to burn through AI tokens. And that’s the part of this AI video tutorial that you can carry into completely different projects. The ghost is optional. The workflow isn’t.
Frequently Asked Questions
Can Kittl turn an image into a video?
Yes. Kittl’s AI video tools can use an image as the starting point for a generated video. In this tutorial, I started with a still wall-art scene and created multiple AI video clips that were eventually combined into one finished Halloween ghost video.
Can you create multiple connected AI video scenes?
Yes, but don’t assume the clips will connect perfectly. One approach is to export a frame from the end of one generated video and use it as a reference for the next scene. That can improve continuity, but generative AI may still slightly reinterpret the image. If the clips don’t match, you may need to regenerate one section or make adjustments during editing.
Why didn’t my AI video clips match even when I used the same frame?
Generative AI doesn’t simply copy the input image frame-by-frame. The model interprets the image as it creates the new video, which can introduce small changes in composition, lighting, objects, or movement. In my case, that was enough to create a noticeable jump between the two clips. I fixed it by recreating the simpler opening clip around the first frame of the more complicated ghost scene.
Do I need another video editor after creating a Kittl AI video?
Not necessarily, but a separate video editor gives you more control. For this project, I used Clipchamp to trim clips, change playback speeds, combine generated scenes, edit the audio, and prepare the finished video. Microsoft’s documentation confirms that Clipchamp’s timeline can combine video, images, and audio as well as add text and transitions. But that being said, Kittl will soon have a video editing feature that may eliminate the need for an editor outside of Kittl.
Can I use this workflow to make product videos?
Absolutely. My Halloween ghost scene used wall art as the example, but the same technique can be applied to apparel, mugs, print-on-demand products, digital artwork, social-media content, and other visual products. The key is to keep the product recognizable while using the AI-generated action to attract attention.
Can I make a Halloween ghost video from one image?
Yes, although the final result may require more than one generated clip. My finished Halloween AI video began with a single product-scene concept, but I divided the project into separate camera and ghost sequences so I had more control over the motion and could correct problems without recreating everything.