
A greeting card video mockup delivers so much better than a static greeting card mockup can. It showcases the front design, the movement of the card, and the inside message in one short clip. A static greeting card mockup can do some of that, but it can’t show the full opening experience. For sellers, that creates a more complete product presentation without having to film every design by hand.
In this tutorial, I’ll show you how I built a reusable greeting card video mockup with Kittl. It requires breaking the process down to the basics. We’ll create one finished image with the card closed. Then we create a matching image with the same card open. And finally, we’ll use those two frames to generate a natural opening animation. Once the base scene works, you can reuse the workflow for different greeting card designs. That keeps you from having to start from scratch every time. This is ideal for Etsy shops in need of listing videos, or any ecommerce site that sells greeting cards.
The biggest lesson from testing this workflow was that the still images matter more than the animation prompt. When both frames look like the same card in the same scene, the video generator has far less to invent. That gives you much more control over the final result.
Why Add a Video Mockup to Your Greeting Card Listing?
A greeting card video mockup can take your listings to the next level. I think of listing images as the ones standing outside the concert, waving people in. Meanwhile, video is the diva already on stage, under the spotlight, belting out “I’m Every Woman.” They go harder than an image because they showcase the whole experience. Etsy’s buyer research found that product videos can increase transparency, build buyer confidence, and communicate details shoppers may not get from images alone.
A card-opening video can also potentially be repurposed in several places. Etsy or other ecommerce product listings, Pinterest pins, or other social posts can showcase these videos. Even a portfolio or presentation showing off the finished card design could benefit from a video. The goal isn’t to replace every static image, though. It’s to add motion where motion helps explain the product.
Building Your Greeting Card Video Mockup in Kittl
For this project, I used a 5.5 × 4.25-inch portrait greeting card and built the workflow around two matching scenes. You’ll want to use your exact product dimensions and any details that make your card different. For instance, the card in this video has squared-off edges, while yours may have rounded edges. For this to work properly, the base images need to look like the product you actually sell. Here’s what you’ll need. We’ll create some of it as we go:
- All of your card’s specs
- Your greeting card front design file
- Your inside design or message
- A realistic closed-card scene image (we’ll create this)
- A matching open-card scene image (we’ll create this)
- Access to Kittl’s video generation tools
You can create the artwork in Kittl or bring in artwork you already made. The important part is making sure the closed and open scenes look right before you move on to video generation.
Step 1: Set Up Your Kittl Project
When dealing with video, I start with a new Kittl project at 1080 × 1920 pixels. That gives you a 9:16 vertical canvas. I used 9:16 because it’s the standard vertical format for most platforms like Instagram Reels, TikTok, and YouTube Shorts. This way, the project was already sized for social video from the beginning. If you’re creating the video for a listing or another platform using different specs, use the dimensions that best fit. This matters because the two base images you create will eventually become the start and end frames for the video. Setting the project up at the final video size means you’re not trying to reframe everything later.
I would also go with 72 DPI. Since the project is being created for video and digital promotion, the pixel dimensions matter more than print resolution. These same still images can also be reused for social posts or promotional graphics, too.
Step 2: Create the Blank Closed Greeting Card Scene in Kittl Agentic
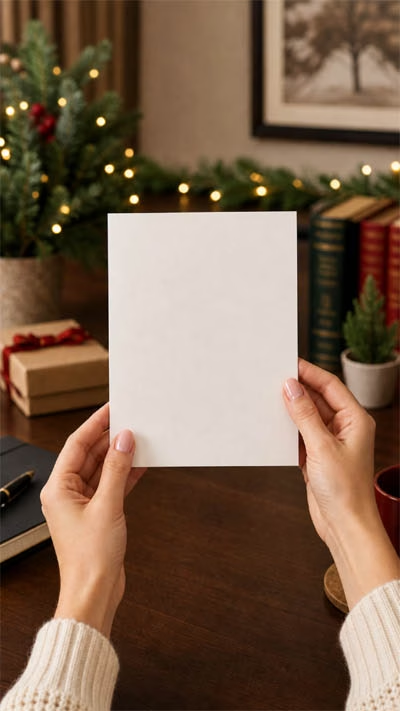
Now that I had my new project set, it was time to create the starting image for the video. What I wanted was a woman’s hands holding a completely blank greeting card so we could clearly see the front. I started with a blank card on purpose. AI has a habit of changing details as you work. Adding the design too early gives it one more thing to mess with. Building the scene in pieces gives you more control over the card itself before asking AI to create the artwork. As an added bonus, a blank version becomes a reusable base you can apply to other listings without starting over.
I also kept the woman and scene deliberately simple. I didn’t want tattoos, distracting nail polish, or unnecessary details. They could suddenly change between frames and pull attention away from the card. Not that you can’t do that, but for this run I wanted to make it as simple as possible. Give AI an inch, and it will almost always take a mile, thinking it’s “helping”, lol.
Why Use Kittl’s Agentic AI for Greeting Card Mockups
With the blank board, I went to the bottom section that says “Describe what you want to create.” I made sure that Agentic AI was selected (not “Generate Image” or “Generate Video”). Agentic AI can remix the same scene while keeping the hands, background, lighting, and card position consistent. It also gave me a more predictable image-generation cost. Generate Image requires you to choose a model. That can range from 5-65 tokens per image, while Agentic typically uses around 15-30 tokens per image.
Final closed-card prompt I used-
“Work only on the first reference image, the scene of two hands holding a blank greeting card over a warmly lit Christmas desk. Preserve the exact hands, fingernails, sleeves, background, Christmas decorations, lighting, camera angle, and overall composition exactly as they are. Change only the card itself so it becomes slightly wider with the exact proportions of a 4.25 × 5.5 inch portrait greeting card, with the width approximately 77% of the height, still centered, blank, flat, and facing directly toward the camera. Adjust the hands naturally and minimally so they convincingly hold the wider card, and do not change anything else in the image.”
Make Sure the Card Actually Matches What You Sell
This turned out to be more important than I expected. My first generated card looked perfectly fine to me. The problem was that I don’t sell greeting cards, so I wasn’t immediately noticing that the proportions were wrong. The card was too narrow for the 5.5 x 4.25-inch portrait card I was trying to represent. That is why I would not treat AI-generated product proportions as “close enough.” Compare the image to the actual dimensions and shape of your product before going any further. It’s much easier (and cheaper on tokens!) if you do this during the image creation. Trying to correct it in video generations can get expensive.
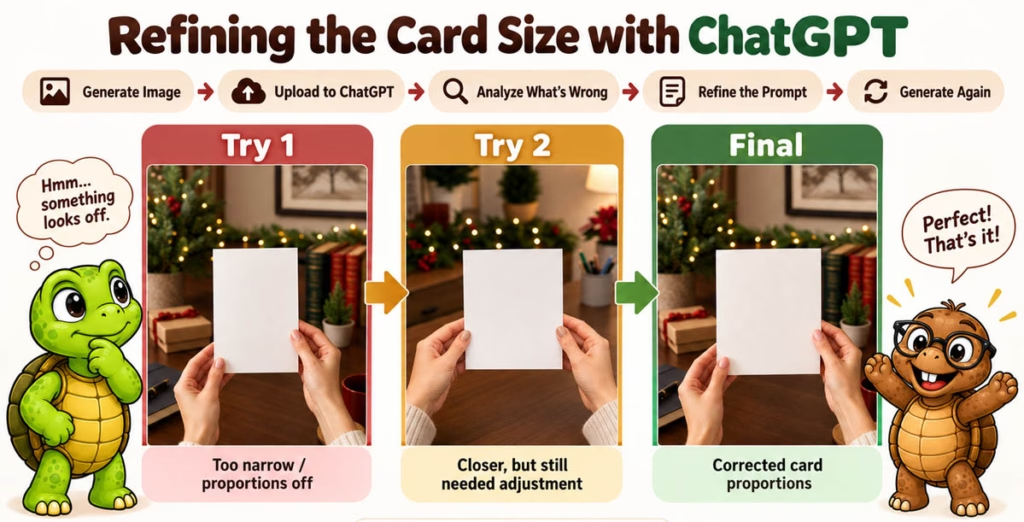
I created my prompts with ChatGPT because it writes them better than I can, lol. It still took me three tries and about 45–60 tokens to get the final image I wanted. The big thing I was watching was the size of the card. After each failed attempt, I uploaded the image back into ChatGPT, had it analyze what was off, and then used its revised prompt and the failed image for the next round. So the workflow was:
Generate Image → Upload to ChatGPT → Analyze → Refine the Prompt → Generate Again
I regenerated the scene until the card looked close enough to the real proportions. And yes, that meant throwing away some perfectly decent-looking generations. Welcome to AI, lol.
Step 3: Apply the Front Design Using Remix
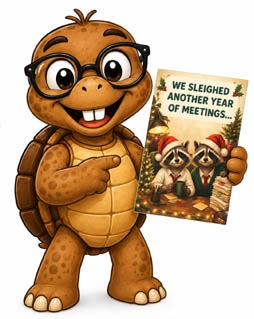
Once I had a blank closed-card scene I was happy with, I used Remix in Kittl Agentic to add the actual front design. This is another reason I like creating the blank version first. If you sell several greeting cards, that blank scene becomes a reusable base image. Instead of rebuilding the person, background, lighting, and card placement every time, you can remix the same blank mockup with another design.
For this step, I gave Kittl the front artwork as a reference and told it to place that design onto the existing card without changing anything else in the scene. Once that generation looked right, I had the finished starting frame for the video. Now I had to create the end frame.
Successful front-design prompt–
“Work only on the first reference image, the vertical photo of a woman holding a blank greeting card at a desk. Replace only the blank front surface of that card with the exact design from the second reference image, preserving it exactly as provided: both raccoons, all Christmas decorations, the colors, composition, and the exact headline “WE SLEIGHED ANOTHER YEAR OF MEETINGS…”.
Fit the design naturally to the card’s perspective so it covers the full front surface edge to edge, keeping all important artwork and text fully visible, with realistic printed-on-cardstock integration, natural lighting, and no artificial glow. Keep everything else in the first reference image exactly unchanged: the woman’s hands, pale-pink fingernails, hand positions, sleeves, card size and shape, Christmas background, desk, lighting, shadows, camera angle, and the vertical composition. Do not redraw, rewrite, reinterpret, crop, mirror, rotate, or alter the uploaded design, and add no tattoos, jewelry, text, logos, watermarks, extra fingers, or any other changes.”
Step 4: Create the Blank Open-Card Scene
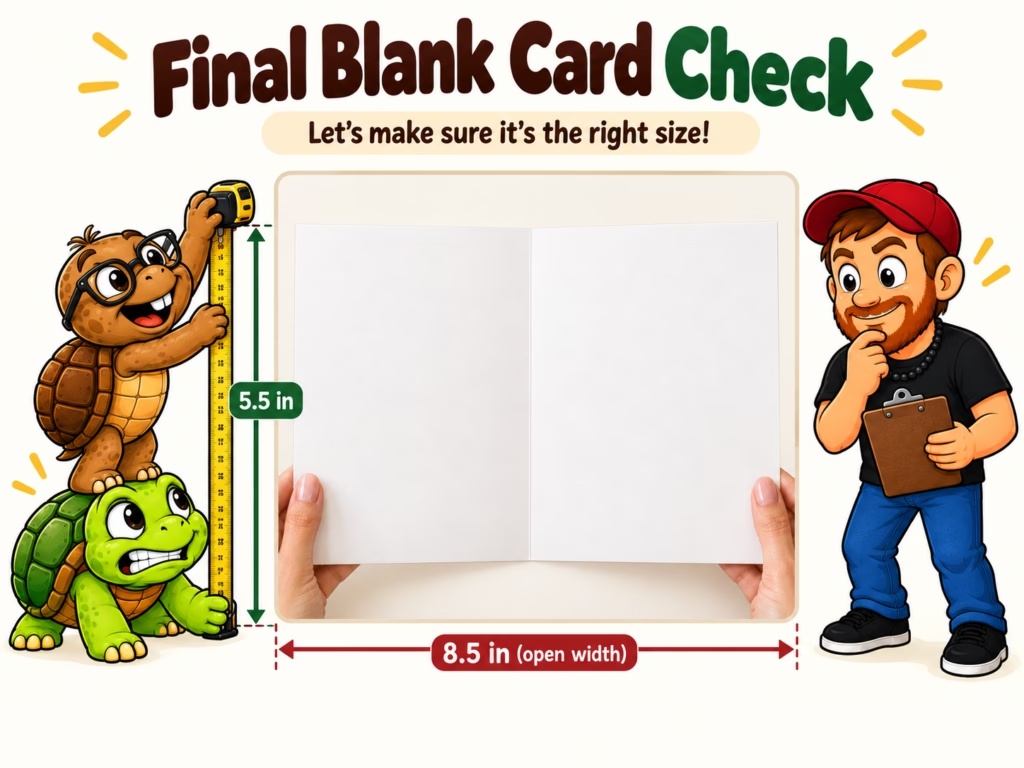
Next, I needed the same woman’s hands holding the greeting card fully open. Rather than starting over from scratch, I remixed the existing blank closed, front-facing card and told Kittl Agentic to change it into an open blank card. Again, it’s easier to work with blanks, and having this blank gives us that repeatable process for making multiple videos with various designs.
Patience is Key
This was the part that took the most patience. Several generations made the open card too small or changed the proportions more than I wanted. One was extremely close, but when I compared it against the original card dimensions, it was still slightly off, so I tried again. It doesn’t necessarily need to be mathematical perfection, though (don’t drive yourself crazy!). You need the closed and open cards to be close enough in scale and proportion that the viewer believes they are watching the same physical card open. It’s all about product representation and making sure that the card looks natural when it opens.
Successful blank open-card prompt:
“Work only on the first reference image, the photo of two hands holding an open blank greeting card over a wooden table with holiday décor in the softly blurred background. Preserve everything exactly as shown and enlarge the entire open card proportionally by approximately 6% so it appears slightly taller and closer in visible height to a closed-card reference, while keeping the card centered and fully visible within the frame. Move the same hands outward only as much as needed to accommodate the larger card, preserving their exact appearance, pale-pink nails, cream knit sleeves, and natural grip. Do not change the card proportions, the equal blank panels, the center fold, the background, lighting, camera angle, table, decorations, books, drink, or any other objects.”
Once I had an open version that matched closely enough, I kept that as my second blank master scene.
Step 5: Add the Inside Greeting Card Design
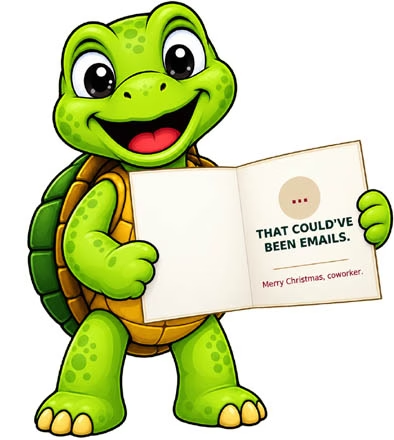
With the blank open-card scene approved, I did the same process I did before with the front-facing card blank. I used Remix again on the final blank version of the open card and added the artwork that needed to appear inside the card. Just like with the front design, I wanted Kittl to change the artwork and leave the rest of the image alone.
Like the closed image with the design, this one came out right the first try. Not that I want to keep harping on this, but this is why I created the blank versions first. If I had started with the design right from the start, it might have taken a lot more tries to finally get it right. Not such a big deal when dealing with just one design, but if you have fifty different designs, those failed attempts can eat tokens quickly! It’s always best to start with the basic idea and build up.
Successful inside-design prompt–
“Use both reference images together, but preserve the first reference image as the full base scene exactly as it is: the same hands, fingers, pale-pink fingernails, skin tone, cream sweater sleeves, open card size, card position, center fold, perspective, lighting, shadows, Christmas decorations, background objects, depth of field, and vertical composition. Keep the left inside panel of the card completely blank and untouched. Faithfully transfer the inside-card artwork from the second reference image onto only the right inside panel of the card in the first reference, following the card’s natural perspective and print surface so it looks professionally printed directly on the physical card.
Match the second reference design exactly in placement, proportions, colors, typography, spacing, circle, three burgundy squares, gold line, and the exact wording and punctuation: ‘THAT COULD’VE BEEN EMAILS. Merry Christmas, coworker.’ Do not rewrite, restyle, reinterpret, misspell, add, or remove any text. Do not move, resize, reshape, recolor, or replace the card, hands, or background. Do not extend the second reference’s cream background beyond the printed right panel area. Add no artwork to the left panel and introduce no new objects, jewelry, tattoos, decorations, logos, or watermarks.”
Double-Check to Make Sure Your Images Are Right
That gave me the two finished images I actually needed for video generation:
- the woman holding the finished card closed
- the same scene with the finished card open and the inside design visible
This is where I would stop and inspect both images carefully before spending any video tokens. Everything we have done so far was to ensure we spend as little as possible on the video creation. If you can get into this habit, it helps you save so many tokens and keeps you from pulling your hair out!
Step 6: Turn the Two Images Into a Greeting Card Video Mockup
Finally we get to the good stuff, lol! I know that seemed like a lot of work just to make one video, but as the Mandalorian says, this is the way. Your token balance will thank me, lol. So I selected the finished closed-card image (the first completed one we made) and chose Generate Video. That became the starting frame. I then added the finished open-card image from my AI creations as the ending frame. This gives the AI generator more to work with by giving it guides of exactly where to start and exactly where to end.
For this video, I used Kling Video 3.0 Pro at a 9:16 ratio. Because I wanted a simple, controlled opening motion between two finished frames rather than a more cinematic scene, Kling was ideal for this. I also set it for 8 seconds, which I thought was plenty of time for the motion we wanted here. At 22 tokens per second, that would make the cost for the video 176 tokens.
The prompt only needed to explain the action between those two finished states. I wasn’t asking the video model to invent the card, design the inside, correct the proportions, or figure out where the scene should end. All of that work had already been done.
Successful video prompt–
“Create one continuous 8-second video using the supplied closed-card image as the starting frame and the supplied fully open-card image as the ending frame.
For approximately the first 2 seconds, hold the closed greeting card steady and fully visible so the viewer has time to read the complete front design. Do not begin opening the card immediately.
After the opening hold, the woman naturally opens the greeting card like a book over approximately 3 seconds. Her left hand supports the card near the fold while her right hand gently pulls the front cover toward the left until the card is fully open and facing the camera. Her fingers reposition naturally only as required to open and support the card.
For approximately the final 3 seconds, hold the fully open greeting card steady in the exact supplied ending position so the viewer has time to read the complete inside message. Do not close the card or introduce any additional movement at the end.
Use one smooth, deliberate, realistic physical opening motion. The card must remain solid paper with a stable shape and consistent center fold. Do not dissolve, morph, warp, stretch, flutter, bend excessively, flip, or replace the card. Do not use a transition effect between the two supplied frames.
Preserve the exact woman’s hands, skin tone, finger count, finger shape, pale-pink fingernails, cream sweater sleeves, and lack of tattoos or jewelry. Do not create extra fingers, hands, nails, jewelry, or tattoos.
Preserve the front artwork and inside artwork exactly as supplied. All illustrations, colors, typography, spacing, spelling, and punctuation must remain unchanged, stable, sharp, and readable throughout the video. Do not animate, rewrite, distort, blur, remove, cover, or regenerate any printed design or text.
Keep the camera completely locked for all 8 seconds. No zoom, pan, tilt, rotation, camera shake, reframing, cropping change, or focus change. Preserve the exact Christmas room, decorations, books, tree, lights, desk, cup, lighting, shadows, depth of field, and vertical 9:16 composition. Nothing in the background should move, flicker, appear, disappear, or change.
Begin precisely on the supplied closed-card frame. End precisely on the supplied fully open-card frame.”
And in this case, it worked on the first video generation. The woman looked at the card, opened it naturally, and ended with the inside design visible, which was exactly what I wanted.
Starting With Images First Can Save Kittl Tokens
This is where the difference in Kittl token cost really starts to make sense. I didn’t keep track of the exact token cost of every image generation as well as I should have, but I do know I created nine images total, including the failed attempts. Kittl Agentic AI can use roughly 15–30 tokens per image, and I’m pretty sure mine were running at 15 tokens each.
At 15 tokens per image, those nine generations would have cost about 135 tokens. Even if we use the high end and assume every image cost 30 tokens, that’s still only 270 tokens. The final Kling Video 3.0 Pro generation cost 176 tokens, which puts the entire project somewhere around 311–446 tokens, depending on what those image generations actually cost.
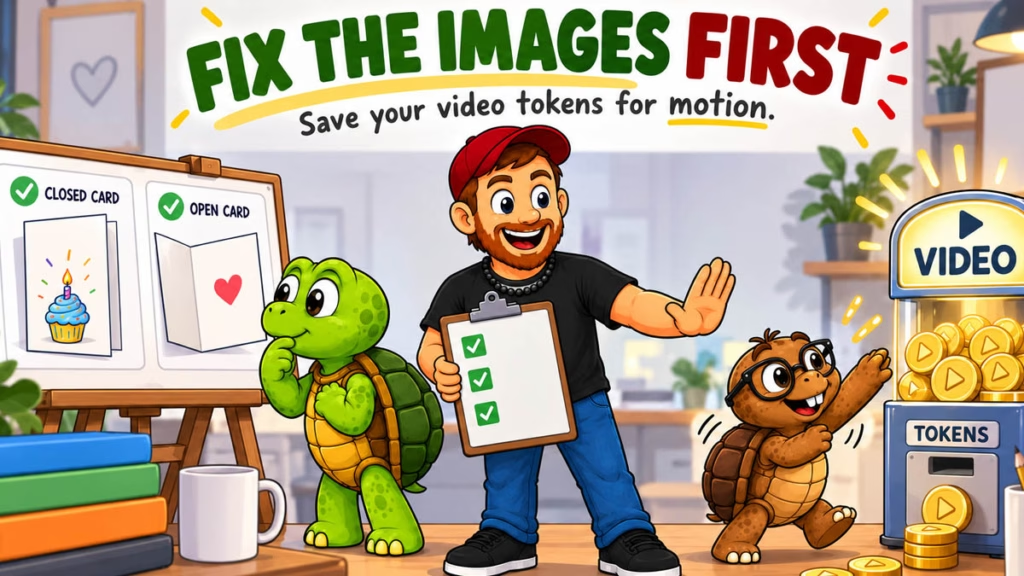
Now compare that to trying to fix everything at the video stage. If I had generated the video nine times at 176 tokens each, I would have burned through 1,584 tokens, and that’s assuming attempt number nine finally worked, lol. That’s a pretty convincing reason to fix the cheaper problems while they’re still images. Get the card size right. Make sure the hands are right. Get the open and closed scenes matching. Then spend the bigger tokens on motion once you’ve already solved everything else.
This Process Can Work for More Than Greeting Cards
Although I built this tutorial around a greeting card, the same basic workflow could work for other products where you want to show an opening or reveal. You could use the same idea for a book, notebook, journal, planner, or another product where the inside matters just as much as the outside. The principle stays the same- create the first state, create the final state, get both of those right, and then let the video model create the movement between them.
You could also take the final open-card frame and use it as the starting point for another short clip, maybe a slow zoom toward the inside design, and edit the clips together afterward. If you want to see how I build a longer AI product video in Kittl, I walk through that process in another tutorial. I didn’t do that for this project, but there’s plenty of room to build on the basic process if you want a longer product video. Let creativity be your guide!
Frequently Asked Questions
How do you make a greeting card video mockup?
Start by creating two matching product images: one showing the greeting card closed and another showing the same card open. Apply the finished front and inside artwork to those images, then use them as the starting and ending frames for an AI video generation. This gives the model clear visual targets for the card-opening motion.
Why should you create the greeting card images before generating video?
Still images are easier and usually less expensive to correct than AI video. Finalizing the product dimensions, artwork, scene, and open-card position first means the video model only has to create the movement between two finished frames. It’s also generally cheaper on tokens in the long run!
Can you reuse an AI greeting card mockup?
Yes. If you create blank closed and open card scenes before applying your artwork, you can reuse those base images with other designs. You may still need to generate a new animation for each card, but you don’t have to rebuild the entire setup from scratch.
Can Kittl create a greeting card opening animation?
Yes. In this tutorial, I used Kittl Agentic to build the images and then used Kittl’s video generation tools with the finished closed-card image as the starting frame and the open-card image as the ending frame.
Can I use a greeting card video mockup on Etsy?
A card-opening video can help show more of a physical greeting card than a static image alone. If you’re creating one specifically for an Etsy listing, check Etsy’s current listing-video requirements before exporting so your final file meets the platform’s current specifications.
Want to Try This Workflow in Kittl?
I’ve been using Kittl for everything from mockups and AI images to the video experiments you see in these tutorials. What I liked about this project was being able to build the scene in Agentic, refine it through Remix, apply the card artwork, and then turn those finished images into a video without having to rebuild everything somewhere else. Best of all, you can test out Kittl for free.
Affiliate disclosure: If you sign up for Kittl through my link, I may earn a commission at no extra cost to you.
The biggest benefit wasn’t that Kittl magically created the perfect video for me. It was that I could break the project into smaller pieces and control each one before moving on to the more expensive video generation.
Greeting Card Video Mockup- Final Thoughts
The biggest lesson from this project was simple enough, lol. Don’t start with the expensive part! Just because I want a video doesn’t mean that’s where I have to start to get it. Build the scene first. Get the product dimensions right. Create the closed and open versions. Apply the artwork. Make sure both finished images look like believable moments from the same scene. Then generate the greeting card video mockup.
That gave me more control, saved tokens, and left me with blank base images I can reuse for other greeting card designs later. I spent more time getting those still images right than I did making the actual video, but that was exactly the point. It let me solve the cheaper problems first and give the video model a much simpler job at the end. It also allowed me to create a reusable template of sorts to make the same video with different designs, simply by making blank versions. Once the base scenes were right, the rest of the workflow became a whole lot easier, and creating the actual greeting card video mockup was a breeze!